Treating Wounds without Antibiotics

Should the time come that requires evacuating one’s home for an extended period of time and living off-grid, there are a myriad of potential health issues that could become as deadly as any gunshot or knife wound.  One of the greatest killers of all time is that resulting from untreated infections.

It’s hard to imagine with today’s medical treatments, medicines and antibiotics that basic wound infections could be any kind of threat.  But, remove your access to such treatments and antibiotics, a simple cut on your hand or leg, once it becomes infected, can kill.

Penicillin was discovered by Scottish chemist Alexander Fleming in 1928.  It’s estimated that penicillin has save the lives of more than 200 million across the globe.  It saved the lives of 12 to 15 percent of Allied Forces during WWII.  Since that time there have been many additional antibiotics discovered that have equally saved the lives of many hundreds of millions around the world.

So what does one do when antibiotics are not available?  Are there any alternative treatment methods that could save lives and eradicate wound infections?

Treating wounds using alternative healing methods will become a vital skill when there is no doctor around.  Besides providing you with the much-needed food, your pantry also holds two items that will help you treat wounds:  honey and sugar.  These two ingredients are beneficial for cleansing and healing traumatic wounds.  Treating wounds with honey and sugar is an ancient method of healing that has been tested over time.  The ancient Egyptians were the first to document this process.  The healing proprieties of sugar and honey are mentioned even in the Bible, Koran and Torah.

People around the world have used honey and sugar to cleanse and heal traumatic wounds; in particular gunshot wounds and battle injuries where a loss of flesh leads to infections.

How does honey and sugar work for treating wounds?

Sugar is a short chain, soluble carbohydrate composed of carbon, hydrogen, and oxygen.  It has many names and it’s also known as glucose, dextrose, fructose, galactose, sucrose, maltose, and lactose.  Sugar has high osmolality, and it’s able to draw fluid out of the wound.  It reduces water content in the injury and inhibits the growth of bacteria.  It is also helpful in removing dead tissue while preserving the tissue that is still alive.

Honey is a viscous, hyper-saturated sugar solution made from 75-80 percent sugar and 20 percent water.  It is very effective at killing staphylococci, including the community-acquired methicillin-resistant Staphylococcus aureus, within a few hours.  Honey also has anti-inflammatory activity and its ability to absorb water provides antiseptic action.  Scientists believe that the healing proprieties of honey are derived from its ability to produce hydrogen peroxide from the glucose oxidase enzyme found in its composition.

Treating wounds step by step

You first have to make sure the wound has stopped bleeding and that it’s very clean.  Cayenne pepper can be applied to stop the bleeding, but I must warn you that it will sting like hell.  You will then have to clean the wound with a mild soap and warm water or a saline solution.  Pat the area dry until there is no moisture inside the wound.  Honey and sugar react and bind with calcium and if calcium is not available because of bleeding, no clot can form.

Pour granulated sugar directly on the wound and make sure it gets down as deep into the wound as possible.  The sugar shouldn’t just be sprinkled on the surface and outer rim of the wound. If the wound is too large, you need to apply honey first and then add sugar on top (you can mix sugar and honey until you make a thick paste).

Cover the wound with a clean bandage and secure it with tape. The dressing will prevent the honey and sugar from leaking out and it will keep the wound protected from external debris and bacteria.

Change the bandage and repeat the cleaning and sugar application once a day. You will have to do it more than once per day when you notice the bandages are wet from the removed fluid.

Alternative to using honey and sugar

Although there are many reasons one should store honey, the chances are that not everyone has this fantastic food at hand. There is an alternative to honey for treating wounds and it involves using cooking oil.

You will need to combine three parts of powdered sugar and one part of cooking oil and mix the ingredients until the mixture is uniformly smooth.  A thick layer (1/2 inch) of this mix will have to be applied directly to the wound. This alternative works just as well and science backs it up.

Sugar will dehydrate all bacteria and prevent it from reproducing.  If the bacteria die, no infection can occur.  The oil coats the outer bacterial membrane and prevents water and foodstuff from entering the cell.  It also prevents egress of cellular waste products.  As a result, the bacterial cell withers and dies.

A few words of advice:

1)  CAUTION – This is a homemade remedy.  Therefore I recommend you should research anything you read.  You will be assured of its use and the accuracy of the information provided.

2)  Commercial honey is not as effective at treating wounds as raw honey.

3)  If you apply cayenne pepper to the wound to stop bleeding, be prepared to experience pain.  It does sting and some people cannot tolerate this pain.

4)  Manuka honey is the best type of honey that one can store and it’s even being used by the New Zealand army forces.

5)  You should avoid using this treatment for infants as they can develop botulism from honey.

Mixed together, honey and sugar or sugar and cooking oil can provide a healing alternative that is available for anyone.  The paste resulting from mixing these ingredients can be applied directly to an open wound.  It is a healing method guaranteed to stave off infection and hasten the healing process. This healing method has been used for centuries and it won’t fail you when the need arises.

Source:  http://prepperswill.com/treating-wounds-with-honey-and-sugar-an-easy-healing-method/

More than 35 years experience in the Preparedness Industry

Do Animals Know Something We Don’t?

I find it quite interesting, even entertaining at times, how some groups get all worked up over very minor changes in our climate.  It’s as if a half a degree rise in temperature over the last 100 years somehow is both our fault and catastrophic as well.  There are natural cycles that have occurred and will continue to occur for as long as the earth will exist.

The thought that the world population is significant enough to somehow affect the climate is very hard to imagine.  Yes, there are a lot of people on this planet but relative to the size of the earth, not that many.  In fact, if you took all 7 Billion of the world’s population, they would fit in the state of Hawaii – not shoulder to shoulder but each on 25 square feet of space.

So yes, the world’s population can indeed affect specific areas and regions of the earth but there is an ebb and flow on our planet and no matter what we humans do, we are subject to that cycle.  Now, it’s not one simple cycle that we must deal with.  Instead, there are a vast number of cycles on this planet that affect habitability.

One cycle is the rotation of the earth itself and the correlation between it and seismic activity.

Scientists have warned there could be a big increase in the number of devastating earthquakes around the world next year.  They believe variations in the speed of Earth’s rotation could trigger intense seismic activity, particularly in heavily populated tropical regions.

With all this science and intelligence on our changing planet it seems we have muddied our own natural survival instincts.  Did you know that there are signals given off by our planet to warn us of impending disasters?

We have so wrapped ourselves in distractions that we cannot take advantage of these signals with our physical body.  Animals still react to these signals though, and while we have muted our own senses, we can rely on theirs as a natural ‘tell’ for what’s coming.

The Earth’s Natural Signals

There are many ways that our planet and its atmosphere convey approaching disasters and changes in the weather.  Some of these signals can be measured by sophisticated human instruments, but they are also picked up and acted on in the animal world.

One of the most well-known is barometric pressure.  You probably hear about this on the nightly news. Barometric pressure drops as storms approach.  This is how animals know things like major storms and hurricanes are nearing.  Hydrostatic pressure is similar, but affects the water pressure, and this is what sends fish to deeper water when the pressure drops enough.

Lesser known but just as important, infrasonic impulses are another sign the earth gives us.  These low vibrations are emitted by natural disasters and can be early warnings for tidal waves, earthquakes or even volcanic eruptions.  They all send the same message to animals that can sense them – trouble is coming.

Animal Signals

There must have been a time when we were just as perceptive as the animals on this planet, since we have lost much of that ability.  Here are some signs and signals that you can observe from the animals around you that may clue you in to when a serious situation is heading your way.

Remember, we may not always have the weatherman to tell us when a massive hurricane is bearing down – but who needs a weatherman when animals give clear signals that trouble is coming?

The Birds and the Bees

Both of these animals are going to seek shelter if a disaster is imminent.  You could watch your own bees or bees from another area head into their hive.  Bees will take shelter before disaster.  Birds may also be migrating in a new pattern before a serious storm.  Birds typically fly south in the winter and north in the summer.  Use this information to look for strange migration patterns.

Henry Streby of the University of California, Berkeley, and his colleagues discovered that golden-winged warblers take off from their expected locations more than 24 hours before storms hit.  In this case, the storm in question produced tornadoes that killed at least 35 people.

On the Water

A lot of fish behavior can tell you about what’s coming.  It’s a great fishing trick to get out on the water just before a storm.  The coming front often turns fish on and makes them aggressive.  When the storm is very close the fish can shut down.  Jumping fish can be a sign of electric impulses in the air and water, or even of pressure changes.

Frogs often head for higher ground, and can actually be seen climbing away from water bodies, before storms.  They will also get quieter at night.

Down on the Farm

It is common for cows and other herd animals to head for higher ground before a storm.  They sense the same pressure changes we discussed earlier.  Horses and other pets might refuse food as well as exhibit agitated behavior.  Chickens also feel the threat, and can slow or stop egg production as a result.

Man’s Best Friend

Dogs become agitated and aggressive before a natural disaster.  They may bark more and be more anxious before a major weather event or other disaster.  They could be wary of certain locations in the yard or on walks that they normally frequent.

Some scientists think dogs and other animals can sense the preliminary waves that signal an earthquake ahead of the destructive seismic waves.  Humans can’t detect P-waves, but most animals have more acute senses than we do.

Picking up on how your dogs are acting can give you last-minute warning of an earthquake.  You might not get a lot of warning, but it could be all you need to run outside where it’s safer.

Dogs are one of the best examples because you can observe them very closely for strange behavior.

A few other strange animal behaviors that could signal disaster are things like:

●  Bats flying during the day;

●  Lady bugs gather just before a heat wave;

●  Monkeys can refuse food and become very agitated before a disaster.  This is also true of human babies.

●  Elephants have been seen to head for higher ground before a tsunami strikes.  Tsunamis are caused by earthquakes, so it’s likely the elephants are picking up warning signs of the seismic shock.

A mixture of our pompous attitude towards our short-lived dominance of the earth, and an overwhelming reliance on technology, has put us at greater risk of falling victim to major disasters.  We do silly things like filming tornadoes and storms rather than seeking shelter.  We rely solely on the news to tell us when things are going wrong.

Of course, the biggest failure that has come from our muting of the earth’s warnings is our lack of preparedness.  While animals stow away food for the winter and head to higher ground in times of disaster, the human animal is so bold that we hardly react till disaster is on the doorstep.

It is this terrifying lack of preparedness that forces so many of us to be the antithesis.  Preppers use this unique time of massive technological advantage and resource access to build powerful systems that help them survive anything from a powerful thunderstorm to the world-changing disasters that will come.

Sources:  https://www.overpopulationmyth.com/7-Billion-Alpha-USStates.html?185,232

www.askaprepper.com/how-to-understand-the-signals-from-animals-just-before-a-natural-disaster-strikes/

More than 35 years experience in the Preparedness Industry

You’ve Got Ten Minutes!

Experience is an excellent teacher but often the cost of such experience can be extraordinarily high and even catastrophic.  So rather than having to personally deal with each potentially devastating consequence of every possible personal experience, we can show true wisdom and learn from the experiences of others.

Unfortunately, far too often we catch ourselves saying, “That would never happen to me” or “I’d be smarter than that” or “What’s the big deal?  Can’t people just take care of themselves?”

Even though there is an overabundance of examples of individuals and families experiencing terrible consequences of their poor decisions or lack of good judgement in the preparedness aspects of their lives, far too few of us take heed and try and learn from such experiences.

One prime example of this deals with the devastating wildfires that are sweeping through many areas of California.  As of the date of this blog, there are 16 wildfires raging throughout the state of California.  The city of Redding has been hit especially hard where 90,000 residents have had to evacuate due to the wildfires.

According to local officials, “Thousands have fled a terrifying wildfire, the so-called Carr Fire, as it tore through an area of northern California after tripling in size to 28,000 acres.  Late yesterday, crews found the body of a bulldozer operator, who had fought to contain the fierce blaze.  The wildfire crossed the Sacramento River and now threatens hundreds of homes on the western fringes of the city of Redding. ‘It’s just chaotic. It’s wild. There’s a lot of fire, a lot of structures burning,’ said Scott McLean, a Cal Fire spokesman for the crews battling the wildfire.”

As individuals, there’s not a whole lot we can personally do to stop a wildfire.  It is far beyond any one individual’s ability to control such a devastating event.  So what can we learn from the experience of others who are caught in such a difficult situation?

According to some reports, “Roads out of the city were jammed with motorists trying to escape the flames, social media postings showed. Thousands of residents were forced to flee the blaze.

Residents of western Redding who had not been under evacuation orders were caught off guard and had to flee with little notice, causing miles-long traffic jams as flames turned the skies orange.

‘When it hit, people were really scrambling,’ McLean said. ‘There was not much of a warning.’”

That last line should cause us to evaluate our preparedness levels.  “When it hit, people were really scrambling. There was not much of a warning.”

In most cases, there is very little warning that extreme danger is imminent.  We usually assume such events would unfold like the forecasting of an approaching hurricane where one might have several days to prepare.  I happen to live in earthquake country and unfortunately, there will be no warning before an earthquake strikes – one must simply be prepared assuming it could take place at any minute.

Many of those who fled the wildfires in the Redding area lost everything as their homes were consumed by the fires.  Even though “things” can be replaced, there are items of sentimental value as well as medications, important documents and survival essentials that could all be lost if proper preparation and practice are ignored.

What would you do if you had only ten minutes to evacuate your home?  What would you take?  What would you leave behind?

Under stressful, panic circumstances, ten minutes may feel like 60 seconds and as a result, precious lifesaving preps may be left behind never to be used.  Now there is little that can be done to alleviate or remove the stress that will naturally occur when such a sudden event takes place but one can make the few available minutes far more productive in taking the items that are most important and potentially lifesaving.

There are two basic levels of emergency evacuation preparedness that each individual and family need to understand and embrace if we are to learn anything from the experience of others.

1)  Essential life-sustaining bug-out-bag.  This is a project where you can take the time to make sure all the essentials are safely packed away in a backpack for each family member.  The items would include water, food, emergency light and heat, shelter and first aid just to name a few of the basics.  Each kit should have enough food and water to last for at least 72 hours.  Personalize each backpack to the needs of the individual.

What is equally critical is where you keep your bug-out-bags.  If you store them away somewhere in the basement or garage where they eventually get covered up by stored Christmas decorations or miscellaneous “junk” we accumulate over time, under a panic scenario, we may not be able to locate them.

Make sure they are in a closet or room close to an outside door and check them often to make sure any expired items are replaced and they are easily accessible to everyone in the household.  Now everyone knows exactly where to go to get and take the essentials of survival.

2)  Important and meaningful documents and items.  This area can be quite a bit more involved and time consuming depending on the number of items you choose to include in this category.  This is definitely an area that cannot be left till the last moment of you will potentially spend all your precious little time trying to locate just one or two items.

The best method I’ve seem is an old-school approach that can easily be modified or updated to reflect what’s most important to you.  It all revolves around the simple 3X5 cards we’re all very familiar with.

This is how it works:  Enter each room of your house and list on a 3X5 card the items in that room that if possible, you’d want to take with you.  Now you have to be careful and keep the list very brief.  Remember, almost everything in your home can be replaced.  So on you 3X5 card, list only the critical items in order of importance so if there’s only enough time to grab one item, the most important one is at the top of the list.

Make this a family project.  Get everyone’s input and make sure everyone’s in agreement as to these additional important items.  Review the location of each item.  It may be helpful to list the specific location of each item on the card as well.

Now it’s essential to keep this card in its specific room in a location where’s it’s easy to find by everyone.  Over time, you want need to update the items on each card.  Every three to six months, it would be wise to go through a dry run with your family to make sure everyone not only knows where the bug-out bags are but understands how the 3X5 card system works.

Now, should a stressful emergency evacuation be required, you can with confidence assign each family member to be in charge of one or more rooms of the house and gather the items on the list.  This will significantly increase your ability to remove all the most precious items from your house in the most organized fashion possible.

Don’t forget the gear bags! The last thing you want to have to deal with is how to carry all the additional items out of your house.  You shouldn’t have an issue with your bug-out-bags as all of your survival gear is neatly packed inside a backpack.  But what about all the other miscellaneous individual items you’ve listed on your 3X5 cards.  You need a way to easily pack them up and haul them out of your house.

Keep an appropriately sized empty gear bag in each room that is designed specifically to hold the items listed on the 3X5 card.  This will greatly speed up the process of gathering and removing everything that’s important to you.

Through the tragic events of these wildfires, we have one more opportunity to learn from the experience of others so we don’t need to deal with the painful consequences of not being properly prepared ourselves.

More than 35 years experience in the Preparedness Industry

Battle of the Bugs

I love the summer time and being outdoors in the mountains.  Unfortunately, one of the sad consequences of being in the wild is dealing with the ravenous flying, stinging and biting bugs that can drive you crazy!

I remember being on a hunting trip in the Sierra Madre mountains of Mexico on horseback one summer and I thought I would literally lose my mind.  Especially in the evening, the mosquitoes were so thick it was ridiculous!  The only thing we could do as we rode through the hills was to break off a quaky branch that had lots of leaves and constantly swat ourselves all over in an attempt to keep the critters from devouring us.

It’s not that the actual mosquito bite is painful in any way – in fact, it often happens without you even knowing about it.  It’s the after effect that will drive you crazy.  And if you cave in to the itch and scratch the bite, it only makes things worse.  And as the itch intensifies, even brushing against your bed sheets as you try and sleep will wake you up wanting to scratch the itch in a futile attempt to alleviate the non-stop announce.

I learned a simple trick to take away the itch of a mosquito bite for several hours.  Heat up a cup of water and dip a spoon in the hot water.  Then press the hot spoon against the bite and hold it there for 15 seconds.  You want the spoon to be as hot as you can stand it without actually burning your skin.  I wasn’t careful enough with one particularly annoying bite on my ankle and still sport the burn scar today from using too hot of a spoon.

Your best bet is to do all you can to avoid the bite in the first place.  There are many home remedies and repellents that have been tried and successfully used over the years.  To help determine what might work best, it’s helpful to first review what attracts mosquitoes in the first place.

Mosquitoes are attracted to:

●  Lactic acid
●  Type O Blood
●  CO2
●  Metabolic rate (high resting metabolic rates are more attractive)
●  Heat
●  Movement

Drinking alcohol and exercising both raise metabolic rate and make you more attractive to mosquitoes. Movement and sweating will make you more attractive to mosquitoes.  But have no fear, there are a number of ways to prevent bug bites in the wild. Here’s a list of a few.

1)  Avon’s Skin So Soft with an active ingredient called IR3535, is considered a biopesticide repellent by the EPA. It works, but in most cases will only provide protection for about twenty minutes.

2)  Don’t Eat Bananas female mosquitoes bite and they love sugar. It’s said that when the body processes bananas it attracts the mosquitoes.

3)  Eat Garlic to repel ticks and mosquitoes.

4)  Lemon Eucalyptus Oil can help ward off ticks and mosquitoes. It’s a very effective chemical. Not safe for kids under 3 years of age. Can cause skin irritation and problems with vision so keep away from eyes.

5)  Seek Shelter or Keep an Insect Net in your bug out bag to keep mosquitoes from being able to get to you. Exercise indoors and shower before going outside.

6)  Deet Repellents of at least 15% DEET will provide protection from insects for about 90 minutes.

7)  Avoid Scented Hygiene Products as some people believe that smelling like flowers will attract bugs that are attracted to flowers.

8)  Catnip Oil was proven to work 10 times better than DEET as an insect repellent according to a study done in 2001.

9)  Citronella Candles work only for short periods of time. It’s the smoke from the candle that keeps mosquitoes away.

10)  Get Your Vitamin B to alter your scent and keep mosquitoes away. The Mayo Clinic suggests that 75|-150 mg of Thiamin (Vitamin B-1) could be enough to get mosquitoes to leave you alone.

11)  Find the Breeze (Use a Fan) and point it in your direction. Mosquitoes cannot fly in breezes over 1mph. In the wild of course you’ll need a solar powered fan.

12)  Protective Clothing can keep mosquitoes off of you or at least prevent them from biting if they land on you. Wear long sleeves, pants, and socks to cover exposed skin. Light colored clothing will blend into the surroundings and make you less noticeable to mosquitoes. Clothing should be tight not loose and should be smooth, breathable fabrics that are tightly woven. You can also buy clothing treated with permethrin which is a proven insect repellent. Look for brands such as Nobitech and Insect Shield. Or buy permethrin spray and treat your own clothing.

13)  Use Soybean Oil Repellents which work a little better than products containing 7% DEET but not as well as products with 15% DEET. The difference is that soybean oil repellent is all natural and much safer.

14)  Avoid Mosquito Havens when you are camping or in the wild. Things such as areas with standing water where female mosquitoes (the ones that bite) lay their eggs. Around your home, empty standing kiddie pools, tires, buckets, or anything else that has filled with water. Avoid bushes, long grasses or tall weeds.

15)  Times of Day can also affect mosquito behavior. They generally feed as the sun is rising and just before it sets in the evening. This is because humidity goes up and the breeze dies down, perfect flying weather for mosquitoes.

16)  Mosquito repellent plants are one of the ways to prevent bug bites. Basil is said to be toxic to mosquito larvae. Rosemary can be burned, and the smoke will help repel mosquitoes. Lavender repels flies, moths, and mosquitoes. Peppermint kills some bug larvae and repels adult mosquitoes. Marigolds work to keep mosquitoes and aphids away. Marigold roots are believed to repel a type of roundworms called Nematodes.

17)  Bat Boxes are one of the great ways to prevent bug bites. Bats eat bugs and can be very helpful in keeping the bug population low. Bat boxes can be built around your home or property to encourage bats to live in the area.

18)  Vicks Vapor Rub when rubbed on exposed skin can be very effective at repelling mosquitoes. The only problem with this method is that the smell of menthol may be unpleasant for you and those around you. If

19)  Cinnamon Leaf Oil has been said to be a natural insect repellent. Combine cinnamon leaf oil with a small amount of water and spray or apply to the skin. Most bugs don’t like the smell at all. If they do land on your skin, the oil can be deadly for certain insects.

20)  Vanilla Extract (Clear) and Olive Oil combined into a spray can be effective in repelling mosquitoes and it’s an all-natural method.

21)  Citronella Soap used when bathing or showering can help give you an odor that will repel mosquitoes instead of attracting them.

22)  Picaridin is similar to the chemical compound found in pepper. More natural than DEET. Levels of about 20% picaridin should be effective.

23)  Make Your Own Insect Spray by combining lemongrass oil, vanillin, citronella, and peppermint oil. It’s safe and can be more effective than products with 100% DEET.

 How to Treat Bug Bites

Although many of the ways to prevent bug bites in the wild are effective, chances are one of the little buggers will get to you at some point. Fortunately, there are a number of great ways to treat bug bites too.

You can use a variety of different natural herbs and plants such as lavender, aloe vera, cinnamon, tea tree oil, calendula, and basil to treat the itchiness. You can also use heat or ice to ease the swelling and pain of bug bites or stings. Witch hazel combined with baking soda can be effective as a treatment for bug bites as well.

No matter where you are, you can prevent bug bites fairly effectively if you plan ahead. With the list of ways above, you should be able to find something that can keep the annoying little pests away from you, so you can either enjoy that backyard picnic or focus on accomplishing the survival tasks you need to get done in the wild outdoors.

More than 35 years experience in the Preparedness Industry

What Do You Need to Just Survive?

There’s no question, if things got really tough and it all hits the fan, we’d want access to all of our preps to help mitigate the trauma of a very difficult situation.  Unfortunately, the odds of something difficult taking place as we sit in our comfortable homes with all our food storage and preps at hand is very unlikely.  Chances are, we will be away from home, either at work or away on vacation or maybe in the hills hunting or fishing when an emergency hits.

And we all know, there’s no way we’re going to carry a large backpack with us wherever we go with a bunch of survival gear and food “just in case” (even though many of us wish we could).  So what happens?  We go off completely unprepared.  This happened to me and my son when we were caught in Hurricane Katrina more than a thousand miles away from all our preps.  It’s an extraordinarily vulnerable feeling knowing the only thing you have to rely on is your survival knowledge and your courage.

So what’s the solution?  It’s really quite simple.  We all need to assemble small, easy to carry survival kits that we keep with us where ever we go.  If it’s not possible to keep your survival kit on your person, then it needs to be very close by, like in your briefcase or desk at work or in your car or in your RV.  These kits are not designed to replace your 72 hr. kits, these are exactly what their name describes, “survival” kits.

Every survival expert seems to have their own list of what they feel is most important to have on hand so I’m going to show you several options so you can decide what makes most sense for you.  Each of these survival kits consists of only 10 items that can easily be kept in a small gear bag or small backpack.  Here are some of the suggestions.  Keep in mind, these are just the essentials.

Todd Smith, Outdoor Life Magazine
Personal locator beacon (PLB) or cell phone
Map of area
Compass
Small first-aid kit
Water bottle
Flashlight/headlamp
Lighter and fire starters
Space blanket/bivy sack
Whistle
Signal mirror

Doug Ritter, Equipped To Survive
HeatSheets brand space blanket
Gloves
Chlorine dioxide water-purification tablets
Nylon braided line
Whistle
Lighter
Waterproof matches
Tinder (for fire starting)
Signal mirror
Personal locator beacon (PLB)

Mike Forti, United States Air Force Survival School
Large knife (machete or hatchet)
Cell phone
Bic Lighter
9 x 12 foot plastic painter’s tarp (0.35 mm thickness)
Mylar survival blanket
Mini LED flashlight
Water purification tablets
Water Container of some sort
Small roll of fishing line or dental floss
Fifty dollar bill (“After a few days lost in the woods eating bugs, it would be a real shame to emerge next to a 7-11, and have no money for food,” Forti said.)

I then came across Dave Canterbury who came up with the 10 C’s of Survivalability.  His list makes the most common sense to me because it lists categories rather than specific items.  I see a lot of lists including cell phones.  I would say probably more than 50% of most states have NO cell phone coverage in remote areas, making these new model GPS’s with text capability subscriptions far more practical and very popular.

So here is what Canterbury says:

DAVE CANTERBURY’S 10 C’S OF SURVIVAL

Dave Canterbury of the Pathfinder School, LLC developed the “10 C’s of Survival” as a handy list of the most essential tools for staying alive in a wilderness emergency. The 10 C’s of Survival should be taken to heart by anyone who spends any time in the back country—indeed, even the front-country.

After all, a day hike can quickly become a situation of perilous stakes. Weather can rapidly turn, bringing frigid rain or wet, heaping snowdrifts where ten minutes before was blazing sunshine. You may stray from the trail and become entirely disoriented, or become suddenly hobbled by a twisted ankle.

The 10 C’s of Survival are best thought of as divided into two batches: a core of five absolute must-have pieces of survival gear rounded out by an additional roster of highly useful, if not essential, tools.

THE FIRST FIVE C’S OF SURVIVAL

Never head into the boonies without these first 5 of the 10 C’s of Survival.

(1) Cutting Tool: Ultimately, this means a sturdy, full-tang survival knife—something that should always be on your person in the backcountry. A design with a four to five-inch carbon-steel blade and a flattened back edge is typically the most dependable and versatile. Well-made survival knives allow you to do everything from clean fish to split kindling.

(2) Combustion: Being able to spark a fire is critical in a survival situation. In inclement weather, it’s the first order of business—fundamental to maintaining your core temperature. Additionally, a blaze can help you advertise your location to potential rescuers. Carry spark-catching material such as the Pathfinder Mini Inferno tinder or Gorilla Tape alongside a ferro rod and a good lighter.

(3) Cover: A common mistake committed by plenty of outdoor recreationists is neglecting to include an emergency shelter in their go-to hiking packs. Even if you’re simply setting out for an afternoon trail hike, you need the ability to quickly erect a precipitation and cold-resistant covering to keep you dry and warm in the event of an unforeseen night out in the backwoods. A poncho, wool blanket, tarp, or even a plastic garbage bag will serve you well.

(4) Container: An ideal container for wilderness use is a 32-oz. stainless-steel water bottle. Staying hydrated is fundamental in an emergency, and you want a durable vessel for storing and carrying water. The high-quality metal additionally allows you to boil water—or melt snow—to render it safe to drink: You don’t want to be dealing with a gastrointestinal malady on top of your other worries.

(5) Cordage: Sure, you can fashion rope from plant materials in the back country—but why expend that time and effort if you don’t need to? Carry a good 100 feet of 550 cord, which can assist in a dizzying array of tasks.

THE SECOND FIVE C’S OF SURVIVAL

In the event of contingencies in the wilderness, the remaining five items of the 10 C’s of Survival can be immensely helpful to have on hand.

(6) Candle: It’s all too easy to forget about an illumination source when preparing for a day on the trail. If you’re stranded for whatever reason, the onset of night is a real threat: You can quickly hurt yourself fumbling around in the dark for kindling or water. Having more than one source of light is best—a headlamp is particularly convenient, but bring candles along as well.

(7) Cotton: It’s no weight or space burden to stuff a few cotton cloths or bandannas in your pack—a level of convenience that belies the versatility they display in the backwoods. From bandages to signaling flags, from fire-starters to head coverings, cotton bandannas are deceptively multi-use.

(8) Compass: There are plenty of methods for orienting yourself in the wilderness, from keying into the wheel of constellations to tracking the sun’s shadow. But bringing along a durable compass with a sighting mirror gives you an unfailing tool for precise navigation—one that readily doubles as a signaling mirror.

(9) Cargo Tape: From injuries to pack malfunctions, a roll of duct tape serves as many functions in the backcountry as it does in the garage.

(10) Canvas Needle: Also called a sail needle, this little tool can be employed to repair clothing or shelters, act as a makeshift compass, dislodge nasty splinters, and for other delicate, high-precision operations.

Remember, the “survival weapons” of the 10 C’s of Survival only work when combined with the knowledge and presence-of-mind to put them to use. If you can stay calm and ward off panic—commonly your greatest threat in the wilds—you can use this basic equipment to keep yourself alive, healthy, even contented, until help arrives.

More than 35 years experience in the Preparedness Industry

What Do I Prepare For?

Being prepared for an uncertain future is much more than just having a little extra food and water stored.  There are so many possible trigger points in today’s world that preparedness needs to become a mindset and not just a something to check off your to-do list.  When one embraces the need to make preparedness a life-long process and not just an event, then one truly becomes an asset rather than a liability.  I’m afraid far too many are relying on the government or others to rescue them in times of need.  It may be helpful to take the time to consider possible events that one could face in the next five years.

Natural Disasters (weather related)
Hurricanes
Tornadoes
Heavy thunder storms
Flash flooding
Mud/rock slides
High winds
Hail
Severe winter weather
Avalanche
Extreme high heat
Drought
Wildfire

Natural Disasters (non-weather related)
Earthquake
Volcano eruption
Tidal wave/Tsunami

Man-made Disasters
War (conventional, biological, chemical or nuclear)
Toxic material emission or spill (from a train, semi-truck or nearby plant)
Riot or other civil disorder
Nuclear plant melt down or other nuclear disaster
Terrorism Fire
Government action against you
Stock market crash
Severe depression
Plague or disease outbreak

Personal Emergencies
Kidnapping
Mugging, robbery or other criminal attack
Unemployment
Financial disaster
Death in family
Home destroyed by fire
Random acts of violence

This is certainly not a definitive list of possible events that could create a need to rely on your preps, but it’s a good starting point.  As you consider these possibilities, you may also want to consider the underlying purpose for your preps – that of basic survival.  If your preps will not provide the essentials of basic survival, you will want to re-think your priorities.

When it comes to survival, it can be reduced to “The Rule of Three”.  You may be military, firefighter, law enforcement, rescue worker or just plain folk with an inordinate amount of common sense.  Regardless, it never hurts to revisit the basics.  And all of the basics can be summed up in ”The Rule of Three” which says, absent sudden death (such as an accident) or terminal illness, your survival is generally contingent upon you not exceeding:

3 minutes without breathing (drowning, asphyxiation)
3 hours without shelter in an extreme environment (exposure)
3 days without water (dehydration)
3 weeks without food (starvation)

Starvation
Most preppers‘ are stocking food.  You will note that starvation is the slowest form of death among the Rule of Three.  You would likely have three weeks before you starve.  Your level of physical exertion has an impact on the body‘s caloric requirements.  Personally, I might survive starvation for five or six weeks as I‘m carrying a lot of extra weight (just in case!).  Don‘t call me over weight, call me prepped!  Keep in mind, your survival strategy must consider the likelihood of you being separated from your food supply in an emergency.  When that happens, stay calm, focus on any immediate threats or hazards and remember that you have three weeks to implement Food Plan B or Plan C.  You do have a Food Plan B and Plan C, don‘t you?

Dehydration
Dehydration occurs much more quickly than starvation. As such, water supply is much more critical to address in an emergency.  Consider that in a temperate climate and without exertion, the human body requires approximately 2.5 liters of fluids per day.  In extreme heat this requirement goes up significantly.  Diarrhea can lead to rapid, catastrophic dehydration as well.  Given that water is far bulkier to store and/or transport than food, and that dehydration is potentially a far more pressing concern than starvation, your ability to procure water in an emergency should supplant food in your ranking of survival priorities.  Stated simply, water is far more important than food.  What is your home-base plan for water?  What is your mobile plan for water?

Exposure
Exposure occurs far more rapidly than dehydration.  Hot or cold, you could find yourself unable to function in less than three hours.  Immersion in cold water, such as breaking through ice, could reduce your time to act down to mere minutes.  So what‘s your shelter strategy when you‘re away from home-base? In the north, temperatures can fall to minus 40 F in the winter.  If you have an accident on a slick road late at night in such conditions, you will likely not be waking up ever again unless you have prepared for such an eventuality.  Exposure kills in hours, or less.  Countering exposure is your number two priority for survival in any emergency situation. Yet most preppers are not thinking about exposure while stocking their pantries.  Prepare for exposure.

Asphyxiation
Asphyxiation kills in three minutes.  This is the emergency situation that gives you the least amount of time to react for your survival.  This is your Priority One survival issue.  An interior fire is the most common cause of asphyxiation.  Do you have a home escape plan in the event of a fire?  If not, make one – it might save your life.  Unless you‘ve been in a burning building, I guarantee that you cannot imagine how blinding the smoke is nor how quickly a structure can become fully engulfed.  If you have children, periodic rehearsal of the escape plan is mandatory.  In the unthinkable event of a fire, panic is inevitable.  Rehearsal helps to moderate the flight reaction, which might otherwise lead to death.

While fire is a common cause, there are other causes of asphyxiation worth your consideration such as carbon monoxide poisoning – usually from a combustion source in the home.  This has also occurred in vehicles stranded in snowstorms.  Vehicles were left running so the heaters would work and accumulating snow shrouded the tailpipe resulting in vehicle exhaust entering the passenger compartment.

Other poisonous fumes can cause asphyxiation as well.  Tanker trucks, rail cars, chemical and other industrial plants often have hazardous materials that, in an emergency situation, could cause you grave bodily harm if exposed.

Take some time with your family and review “The Rule of Three” as it might relate to a variety of emergency situations.  Assuring our families have the understanding and skills necessary to survive life threatening occurrences will provide peace of mind that we’ve done what matters most as we continue with our life-long process of being prepared.

More than 35 years experience in the Preparedness Industry

Don’t Singe Your Eyebrows!

Most kids have a real fascination with fire.​  There is something magical and alluring about an open flame.  As parents, we’re constantly warning our children not to play with matches stressing the consequences if they disobey.  Nevertheless, it’s an important part of their education to understand the proper use of and correct way to build and lite a fire.

Growing up as a boy scout, learning how to properly prepare and lite a campfire was an important rite of passage.  Understanding how to find and create the proper amount of tinder was crucial.  Then building the structure – a teepee, a log cabin, a pyramid or a lean-to was always a thing of pride.

In our scout troop, one had to qualify to be a good fire starter – it wasn’t something everyone could do well.  It took practice and experience as well as the knowledge that each of the three key components of starting and maintaining a fire cannot be neglected.  These three factors are:

1.  Ignition source
2.  Fuel
3.  Oxygen

Most failures in building a fire come from not properly securing and preparing the right kind of fuel.  Whether it be the lack of flammable tinder or using too large of pieces of wood or trying to ignite damp or wet wood – many boxes of matches have been wasted trying to ignite a poorly built fire.

As a scout leader, one of my goals was to make sure every scout knew how to properly build a fire that could be ignited with just one match. We would have an annual competition to prove each scout could start a fire under adverse weather conditions in simulated survival conditions.  Each scout was given 30 minutes to prepare his tinder by creating feather sticks.

Then the simulated adverse survival conditions – we would hold this competition during the winter, usually in December.  The temperatures were always below freezing and there was almost always snow on the ground.  The boys were required to strip down to just gym shorts and shoes – no shirts, jackets or hats.  They were given just one match and were expected to start their fire and use the heat to keep from freezing.  Just a side note, we did this in our backyard so we were always close to a warm house if needed.

On the count of three, the boys all ran outside, set up their fires and lit them with their sole match.  As soon as their fires got going, each would stand over the flame to benefit from the warmth of their small fires.  As leaders, we would always join the scouts in this competition.  Each year, every scout was successful because we had spent the time to teach the essentials and helped them understand the necessity of taking the time to properly prepare their tinder and build their fire correctly.

One must be patient.  The lack of patience in preparing your tinder and properly building your fire will in most cases result in no fire at all.

In the event you have a limited supply of dry fuel to keep you fire going, you can increase the temperature of your fire by adding more oxygen similarly to how blacksmiths do – by using a bellows.

I learned how beneficial extra oxygen can be in burning moist, difficult to burn wood.  I had a large tree in our yard that was blown over in a terrible wind storm.  I cut most of it up to use as firewood.  When it came to the stump and roots, I figured I’d just need to haul it off to the dump because there was so much dirt compacted within the intertwined roots, I knew it would never burn.

I decided to try an experiment; I was able to start part of the stump on fire and I brought a portable fan outside and placed it close to the burning stump.  When I powered up the fan, the flame immediately increased and I was very curious to see how far the stump would burn.  After a few hours, there was no longer a flame but just bright orange coals glowing as the fan blew on them.

I left the fan going all night and when I went out in my yard in the morning, I couldn’t believe what I saw.  All there was in front of the fan was a pile of dirt, the dirt that had been compacted around the roots.  Every bit of wood from the stump and all the roots had been completely burned – all due to the increase in oxygen.

When working with a campfire that is not burning well, the very inefficient and sometimes painful way we have all tried to add more oxygen is by blowing on the coals at the base of the fire.  For me, this has never been a pleasurable experience.  First, it’s hard to get close enough without getting burned and second, I would always get smoke and ashes in my eyes.

Then I discovered the solution; I learned how to make a portable bellows that solves the problems of smoke and ash in your face plus being much more efficient is getting the additional oxygen right where it’s needed.

You can easily make one these portable bellows for just a buck and it will collapse and easily fit in your pocket.  You’ll need to make a trip to your local dollar store and purchase a “Selfie Stick”.  Then with a hacksaw, cut off the very end that has the attachment to hold your phone.  Then peel back the rubber grip on the end of the handle and cut off the very end of the handle as well.  Voila – you now have a portable bellows.  Check out this video to learn how to make several different sizes:

This will be a fun project for the whole family.  Everyone should have their own portable bellows and become an expert in building and maintaining a fire.  Now is the time to learn and practice – not when you’re in an emergency situation.

More than 35 years experience in the Preparedness Industry

Cut Off My Feet!

As a kid, one thing I really hated was being cold.  I remember getting wet and chilled to the bone tubbing as a kid.  My hands were so cold, I wanted to cry.  When I got home, I thought running hot water over them would take away the pain – boy, was I wrong!  I couldn’t believe how much it hurt! I learned not to use that tactic to warm my freezing hands in the future but I still hated being wet and cold.  Tubbing was so much fun, but there was always a price to pay.  In addition to tubbing, often hunting was also a time of painful cold.

When I’d go deer hunting with my dad, we’d get up early on opening morning, leave the warmth of our sleeping bags, put on our coats and orange vests and hats and hike out to the edge of a clearing and sit and wait for the sun to come up.  Since it was typically late in October, it was always cold before sunrise in the mountains.  As a young kid, it was hard to sit still for what seemed like forever but it almost always paid off, we’d see several deer as they were looking for a place to bed down for the day.

Problem was, after the warmth of hiking wore off, just sitting there in the dark, I would start to shiver.  My rear would get cold sitting on the ground and my feet would start to get cold.  I hated it when my feet and toes would get cold because it was always difficult to warm them up.  Unless you took your boots off, even sitting close to a fire didn’t seem to warm them up.

I remember being warned as a kid not to rest your feet too close to a fire because once you actually felt the heat of the fire through your boots, they were too close, too hot and you could both burn your boots as well as your feet.  I had a friend who was wearing rubber winter boots, his feet got cold and he tried to warm them by the fire.  He got too close and his boots melted and badly burned his feet before he could get them off.  He was in so much pain he wanted to cut off his feet.

Over the years, I have purchased very warm boots (I personally like the Sorel brand) but they can be heavy and clunky if you’re planning on doing a lot of hiking.  Unfortunately, the lighter weight hiking boots just never provide the warmth once you stop moving around.  Then I discovered the solution!  You’re probably familiar with space blankets – thin mylar blankets that help keep you warm by reflecting your body heat – great in an emergency.  Well, this solution works on the same principle, reflecting the heat from your feet.  The mylar blankets are far too thin and would bunch up if you tried to line your boots with one.  Luckily, there’s another solution – car windshield sun shades.

You can pick these up at your local dollar store for just a buck.  I picked up ten of them to keep with my preps for future needs.  Just remove the insoles from your boots and use them as a pattern.  Trace around them with a Sharpie marker, and cut them out.  Slide the perfectly cut sun shade inside your boot, shiny side up. Now replace your insoles.  You can also try placing the cut out sun shade on top of your insole. You will be amazed how warm they will keep your feet.  Even though the material is thin, it’s rigid enough that they won’t bunch up when you walk.

Here’s a quick video with directions on how to make these great foot warmers.

Put these sun shades on your shopping list and pick up several.  You can fit all your family’s winter boots needs and have extras for when the kid’s boot size change.​

More than 35 years experience in the Preparedness Industry

Hypothermia – It Can be a Killer

It was June 28th, 2001 when I decided to pull the trigger on volunteering for the 2002 Winter Olympics in Salt Lake City.  It really never was a question – I always thought it would be a great and memorable experience to volunteer to help with the Olympics – a once in a lifetime opportunity.

The interviews and evaluation process to determine where our talents and abilities could be best used was quite impressive.  I thought for sure they would ask me to either be a bobsled test pilot to make sure the track was in good shape or the guy at the starting gate of the Giant Slalom or Downhill events.  No such luck.  I was given, however, a pretty cool assignment working with the main ice skating events.  I was called to serve as a Photo Marshall overseeing Short Track Speed Skating and all Figure Skating events.

As a Photo Marshall, my job was to keep all credentialed photographers in line, make sure they kept all the rules, manage the “Kiss and Cry” (where the skaters sit with their coaches/trainers waiting for their scores) and make sure they didn’t harass the athletes trying to get a good or unique shot for their publications.  It was kind of neat when friends would say to me, “I saw you on TV last night!”  Because I stood close to the edge of the ice, when skaters would pause during their performance, if the pause was on my end of the ice, I could usually be seen standing in the background.  I kinda felt a little like a celebrity – stupid, I know.

So when the 2018 Winter Olympics in PyeongChang, South Korea started in February, I was really excited to watch all I could and dream of the glory days of 2002.  I must admit, I was a little confused by several news reports stating it was just too cold for the athletes and spectators.  It’s been so cold that several events have been rescheduled hoping for better weather conditions.  Now I get it – for the athletes to have an opportunity to perform at their very best, the weather conditions need to be ideal.  But I can’t help but think, “What part of ‘Winter’ do you not understand?”  Surely, with today’s sophisticated equipment and high tech winter wear, a little colder weather shouldn’t throw some in a tail spin.  I then, of course, began to reflect on the level of my personal preps as it relates to cold weather conditions.

I love being in extreme cold conditions IF I have the proper winter gear, but there is nothing more miserable than not being properly equipped with warm clothing and being chilled to the bone.  Over the years, I have learned the importance of layered clothing to help in assisting the regulation on proper body temperatures as well as allowing moisture to wick off.  Rather than wearing just a large, warm coat, wearing several layers of lighter clothing makes all the difference.  You don’t want to get too hot where you begin to sweat – moisture can greatly reduce the insulating functionality of you winter gear and potentially allow hypothermia to set in.

You don’t want to mess with hypothermia – it can be a killer.  A number of years ago, I was on one of our many backpacking trips to the Wind River mountain range in Wyoming.  The fishing in those high mountain lakes is to die for!  
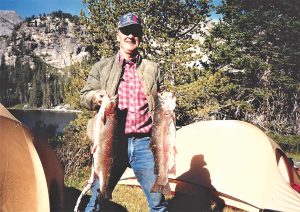
There was a group of six of us and we were on the last few days of our week-long trip.  We would take topographical maps and compasses with us as we seldom were hiking on any designated trails.  We had to cross rivers frequently holding our backpacks above our heads.  On the other side of each river, we would take an hour break, build a big fire, strip down and try to dry off our clothes.  You don’t want to try to hike, especially uphill, with wet pants – it will totally exhaust you as they constantly are pulling on your legs.

On our next to last night, it poured on us all night long.  It was one soggy mess when we got up the next morning.  After breaking camp, we began bushwhacking through the dense forest to get to a specific ridge we needed to climb to find our next lake.  Pushing our way through the rain soaked brush quickly made us as wet as if we had just crossed a river.  We knew it would be several hours before we would be out of the wet brush so it didn’t make any sense to try and dry off.

As we reached the base of the steep ridge we needed to climb, my father in law made a decision that almost cost his life.  Rather than have his wet pants pull on him as we climbed the ridge, he stripped down and put on a pair of nylon gym shorts.  This looked like a great idea but the rest of us decided not to follow suit.

As we began climbing the ridge, heavy clouds moved in and it began to snow.  Keep in mind, its mid-August and we weren’t properly prepared for winter weather.  Even though it was getting cold, the hard work of climbing the ridge was keeping us warm.  The higher we climbed, the more it snowed.  In addition, as we approached the top, heavy fog set in.  Once we reached the top, we knew we were in trouble because the ridge had some steep drop offs and cliff areas and we couldn’t tell how close to the edge we were.  Our maps and compasses did us no good since we couldn’t see more than a few feet in front of us.

We decided we were going to have to bivy on the top of the ridge which was above the timber line as the wind was picking up and blizzard conditions were intensifying.  During this ten minute decision making break, my father in law decided to put his wet pants back on.  The tent we chose to set up was a 4-man North Face dome tent.  As soon as we got it set up, the six of us pilled in to get out of the wind and snow.

After zipping the tent door closed, we all looked at each other wondering how long we would have to hole up in the tent waiting for the storm to pass.  If it was going to be a while, it was going to be pretty uncomfortable in that a 4-man tent really only accommodates 3 men.  Now there were six of us in very cramped conditions.  As we sat there, I noticed that my father in law was shaking uncontrollably.  The rest of us were wet and cold but not shivering anything like he was.  We quickly realized he was suffering from hypothermia.  Hiking up the ridge in the cold, wet conditions in his gym shorts had allowed much of his body heat to escape through his exposed legs.  Then when we stopped at the top, putting on his wet, cold pants just made things worse.

We knew we needed to get his wet clothes off him and put him in a warm, dry sleeping bag to try and raise his body temperature.  Luckily, I had made a big investment just before this trip.  I had purchased a new down mummy sleeping bag that had a Gore-Tex liner.  Due to the previous rainy night, everyone else’s bags were wet.  I quickly unzipped the tent door and went back out in the storm to fetch my sleeping bag off my backpack.  As soon as we got him in the bag, he lost consciousness.  We all tried to lie down close to him to provide as much heat as possible.  The only way we could accomplish this was to lay on our sides due to the cramped conditions.

During the next 18 hours we were confined to the tent, my father in law came to a couple of times and we tried to get some hot soup down him (this almost caused carbon monoxide poisoning using one of our backpacking stoves inside a closed tent). The wind was blowing so hard at times that the tent was being pushed down on us.  We prayed hard the tent would hold up and protect us from the storm.  I happened to be lying on my side closest to the tent door.  I was so grateful at about 3:00 AM when I unzipped the door just enough to take a peek outside and I saw wonderful, bright stars in a clear sky.  The storm had finally passed!

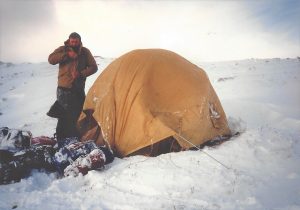
At first light, after getting him dressed, we wrapped the sleeping bag around my father in law and sent him down the hill with two of our group to help him.  The rest of us packed up the tent and carried the extra backpacks back down the hill to where there was some timber.  There we built a huge bonfire to warm everyone up and dry out our clothes and gear.  After resting for several hours and eating the last of our food, we knew we had a big challenge ahead of us.  We had scheduled our Indian guides to meet us at a prearranged pick up location to take us out across the Indian reservation.  My father in law was as weak as a kitten and even carrying his pack for him, it was going to be very difficult for him to hike the 20 miles we needed to go the meet our ride.  Luckily, I was in much better shape back then and I told the group I would go ahead because I was afraid we would miss our ride.

I was late as I entered the clearing where our ride was to meet us.  In fact, they had waited almost an hour and had given up on us and were pulling out of the clearing.  I ran after them yelling and waving my arms and luckily they saw me in their rear view mirror.  It took almost another two hours for the rest of the group to arrive, but we all made it home safely, much wiser about how to handle adverse weather conditions and the life threatening effects of hypothermia.

More than 1,000 deaths occur each year due to hypothermia, most of which could have been avoided had the proper gear been used.  Bottom line – You don’t want to mess with hypothermia – it can be a killer.

Source: https://consumer.healthday.com/environmental-health-information-12/environment-health-news-233/more-americans-dying-from-hypothermia-cdc-says-696679.html

More than 35 years experience in the Preparedness Industry

The Plague is Back? What Do You Need to Know?

What comes to mind when you think of “The Plague”? A few months ago you probably thought that it was a long lost, eradicated disease that killed hundreds of thousands of people a long time ago. However, as a resurgence of the disease hit Madagascar in November, we all realized that we are never completely safe from diseases we thought were gone.

Is The Plague truly a threat? And if so, what do you need to know about it?

Is The Plague Truly a Threat?
The easy answer to this question is no, not today. It seems that it’s been contained to Madagascar. While nine other East African countries were threatened due to trade, no cases were found off the island. Also, while over 200 people were killed out of 2300+ people who were affected, that number peaked, leaving new cases pretty minimal today. That’s the short answer.
The long answer is, yes, possibly yes.  Yes, the disease was contained and treated. However, in a time of world travel and world trade, you can never discount the possibility of the spread of any disease. So here’s the information you need.

How Does The Plague Even Start?
The Plague originates from a flea that carries a bacteria called Yersinia pestis from dead animals to live animals or humans. The bacteria enter the bloodstream, causing the infection.

Types of Plague
Bubonic Plague– The infection is localized to the lymph glands and ducts.  Within a week fever, vomiting, and headaches occur as lymph glands swell and become painful. Eventually, extremities develop gangrene due to lack of blood supply. If left untreated by antibiotics, there is a 90% mortality rate.
Pneumonic Plague – The organism infects the lungs. This form is the most dangerous form because it can be spread from human to human. It still has the original source (flea bite), but can be transmitted by microdroplets from breathing, coughing, sneezing or through mucus. This infection causes coughing, eventually coughing up blood and ultimately, respiratory and circulatory failure. There is a 100% mortality rate if left untreated by antibiotics.
Septic Plague– The infection spreads to the blood. This can cause super-infections that can shut down organs, also causing death.

Prevention
Again, there are no known cases outside of Madagascar, so there is no indication that there is a definite threat. However, for precautionary purposes, there are some things you can do to prevent infection.
1- Invest in particulate masks. When traveling keep a mask close by. If you notice extreme coughing, wear the mask. Even if you aren’t concerned about the Plague, other respiratory diseases can easily be transmitted in airplanes, trains, etc.
2-  Check with your doctor/pharmacy to ensure they have easy access to the antibiotics Streptomycin and Tetracycline, which have been proven to treat the infection. If administered within 24 hours of the infection, chances of survival are significantly greater. If a pandemic ever occurs, you need to make sure you have access to the appropriate medications. There is no immunization so treatment is the best option.

Luckily the risk for a Plague pandemic was localized and minimized fairly quickly.  However, it was a good reminder that we are not immune to diseases we thought were eradicated.

Sources:

http://www.who.int/csr/don/27-november-2017-plague-madagascar/en/

http://www.cnn.com/2017/11/13/health/plague-madagascar-decline/index.html